Synology DS218+ RAM upgrade

Recently I had the chance to aquire a Synology DS218+ NAS drive. I’ve had a DS216j for quite a few years – this beast has not missed a beat in over three years, constantly spinning its 3Tb drives for 24 hours a day.It’s been a web server, SFTP server,email server… download / torrent box. It’s been a very good servant. but recently, it’s been showing its age, especially when trying to use some of the built-in apps on it, such as the gallery, so I decided to get an updated model.

I could have went with another make, but when this beast has been so good to me, it felt wrong to stray away, so I went for a DS218+ with a 12tb Seagate Ironwolf drive.

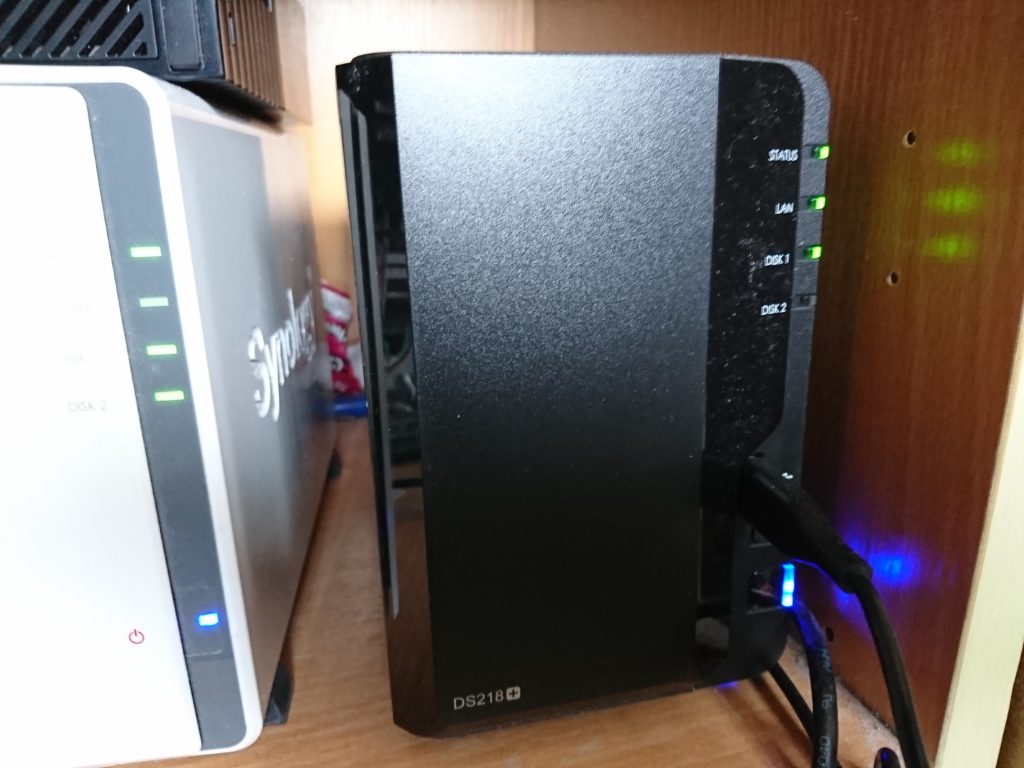
It arrived a couple of weeks ago, and it’s currently spinning away next to the old DS216j.

One thing that drove me towards that model is that it was upgradeable – or at least the RAM is. It comes with 2Gb built in, but the blurb on the website said you could get a memory expansion for it. It could go up to 6Gb. Cor! I had a feeling this would be a custom memory module, and probably more expensive than normal RAM, so I thought I’d just update it if and when I needed it.

After it arrived, and while fitting the drive, I noticed the RAM expansion looked particularly “normal”, just like a standard laptop DIMM socket. I did a bit of digging around and yep, it takes normal DIMMs. Hurrah! In fact the article I was reading suggested you could get a larger memory module such as an 8Gb one, and it’ll work fine. So, I got it.

It arrived at Mercuryvapour Towers just a few moments ago. So, how easy is it to fit? Oh, very. For some reason, I thought this would be a little more involved but it really isn’t.

The memory I opted for is… “Crucial CT102464BF160B 8 GB (DDR3L, 1600 MT/s, PC3L-12800, SODIMM, 204-Pin) Memory”. It set me back just under £30, but looking at the prices on amazon today, it’s gone up to £34.

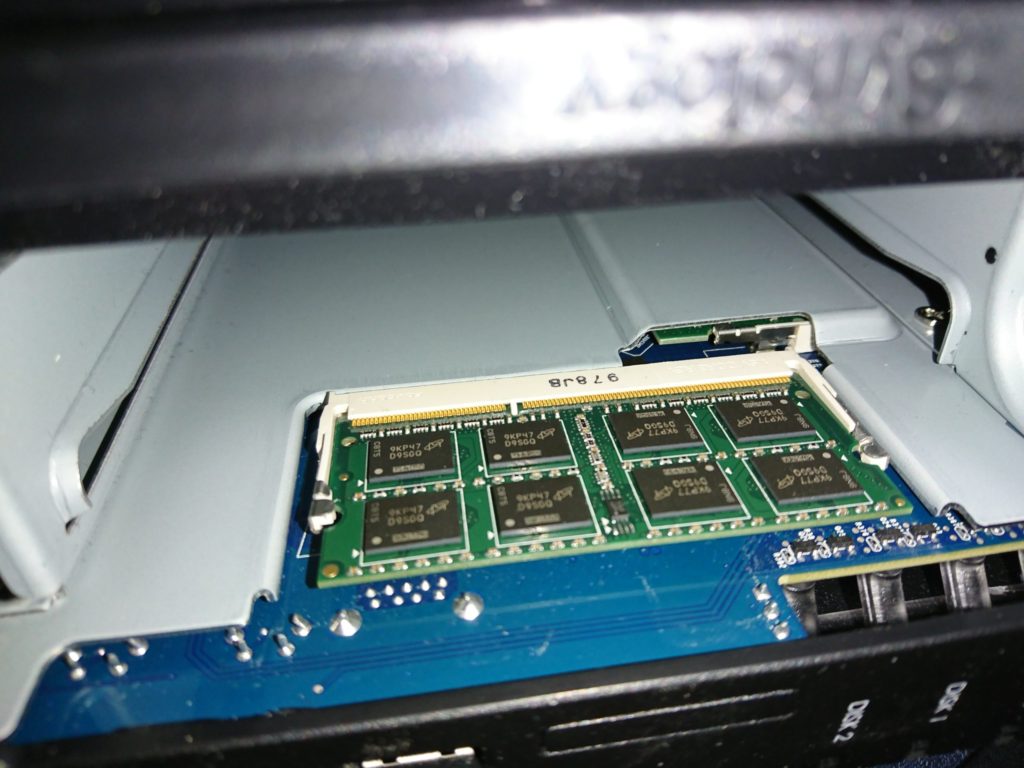
Anyway, shut down the device. Slip off the front cover, and remove the right drive bay. Under this, you will see a white DIMM socket. Slide in the memory module (with the notch on the left hand side), and youll hear the levers click. Just the same as any other RAM module really.

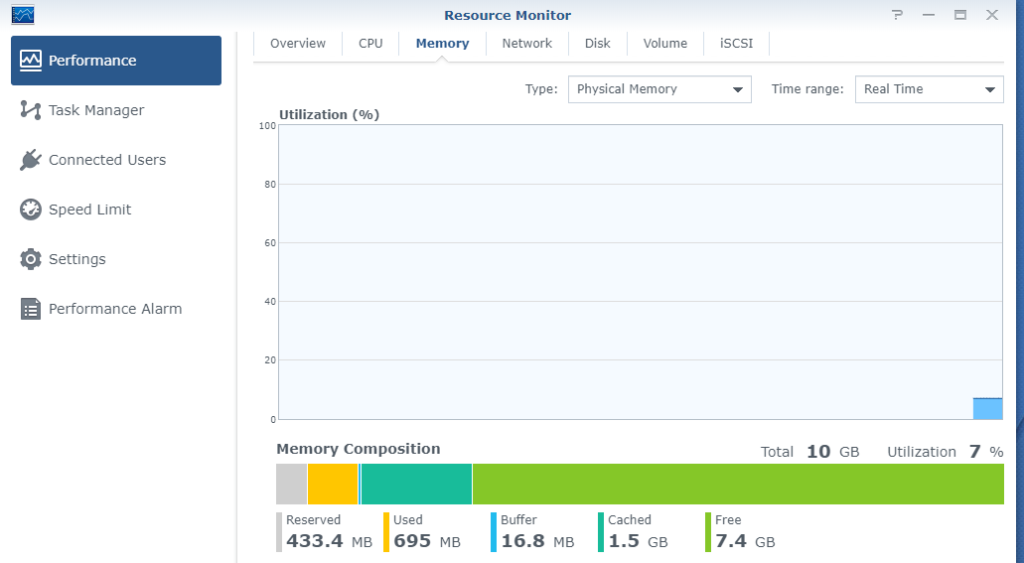
I booted it back up, and confirmed it did indeed read 10Gb. It was all a lot easier than it sounded in my head.

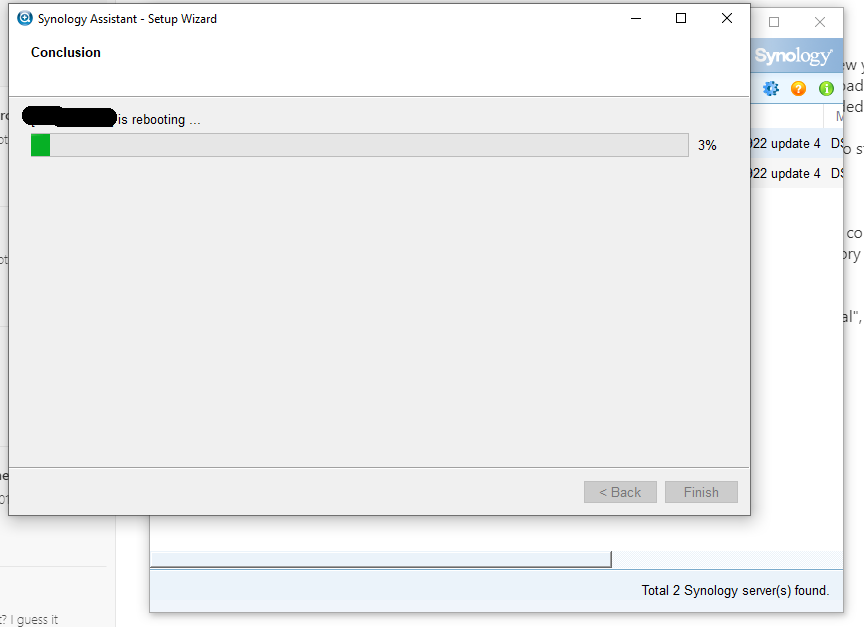
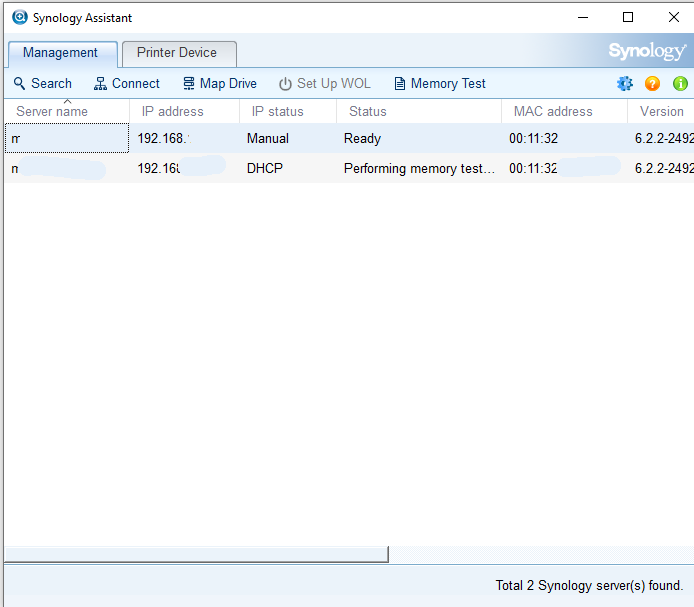
Finally, the last step is to perform a memory test on the device This isn’t something you can do from inside the NAS operating system – instead, you have to download the Synology Assistant software. Download, install and run it. Select your NAS drive, click the cog button in the top right, and click “Perform Memory Test”. Go back out to the device list, and you’ll now see a “Memory Test” button. Press this, and it’ll warn you that this will take time to perform the memory test, and that’s going to reboot the machine…

The software will report that the device is “Performing Memory Test”, and the power light on the NAS drive will constantly flash orange. Unfortunately, there’s no progress monitor, so I have no idea how long will be left. At the time of typing, it’s up to about 90 minutes. If you’re going to do this, I’d recommend doing it when you’re not planning to use the device. (EDIT: It took just under 4 hours to complete the memory test)

No doubt some of you are wondering if you can update the 2Gb that’s already built into the device? Apparently, yes, you can. It’s just another memory module. Unfortunately, it’s inaccessible without fully dismantling the device, so you have to question whether it’s even worth doing at all. 10gb should be enough for a NAS drive under any circumstance… it’s more than what’s in most perfectly serviceable PCs.

EDIT: I was doing some thinking about what the whole point of 10Gb would be, and I think I’ve found it. Virtual machines. I’m actually typing this right now on a virtual machine that’s running of the NAS drive. I’m currently running a bare, yet serviceable Linux Mint installation from it. Something which I don’t think would be possible with my previous NAS drive. This could be fun!
Hard drive woes, 2012, part 3

I’m returning back to the ‘old’ subject of my Lacie “Network Space 2” drive, which committed suicide a few months back, thanks to a couple of email questions. You may have followed the previous posts where I mention getting the data off the drive. this was, in all, a 90% success, but even running Linux, I ran into a similar problem as pointed out in the email. Some of the files couldn’t be accessed. I knew it was one I could easily overcome, but putting the time, and the little bit of effort in to do it, was a bit of a bore, so I left it.

That is, until my health problems re-arose. Well, not quite. I just had to go to the hospital so they could stick things all over my chest, and take yet more of my blood. Are they panning that shit for gold, or something? They might find amber nectar in there, but certainly no gold.

I digress. I decided to fire the drive up again, and rescue the last data on there. The problem was, that although I moved the majority of the data off the drive, I couldn’t access certain files, as they were owned by “root”, basically, the superuser of any Linux system. If you boot from a live Linux CD as I suggested in the past, you’re only a standard user. You’ll need to access the files owned by this root user.

Since my last update, I managed to find my 4Gb USB stick, so I changed my plans from using a live CD, to using a similar live CD, but mounted on a USB stick. To do this, you download the ISO you require as normal, download and run a program called Unetbootin, and allow it to work its magic. This allows you to have a USB stick with a bootable version of your favourite non-standard operating system. This was, as you can imagine, a lot quicker, smoother and quieter than having the DVD drive access something every time I move the mouse. This time, I ditched Ubuntu, and used the Ubuntu-based Linux Mint. It’s just that little more user-friendly. A couple more useful utilities , and because it’s on the USB drive, I can happily use stuff like Firefox without the whole system freezing while it uses the DVD drive.

Of course, you’ll run into the same problem you had with the original Ubuntu. You’re still a standard user. This is how you log-in as root…

Open “terminal”
Type…

sudo passwd root

It’ll then prompt you to enter a new password. Twice. It’s thorough like that.

Click on the “Start” button equivalent (forget what it’s called) and click “Leave”

There’ll be an option in there for a new session. Select that, and enter the user “root” and your new root password. Hurrah, you’ll now have a GUI with root access, and should be able to move those stubborn files as you would normally. I assume these instructions will work good with many, if not all Linux distros.

Thanks to the root access, I was able to have a poke around the drive’s “hidden” sections, and examine the “messages” file to see if I can decipher exactly what went wrong with it. Basically, I can’t.

Sep 18 02:04:44 NetworkSpace2 kernel: [  180.820000] ata1.00: status: { Busy }
Sep 18 02:04:44 NetworkSpace2 kernel: [  180.820000] ata1: hard resetting link
Sep 18 02:04:44 NetworkSpace2 kernel: [  181.330000] ata1: SATA link up 1.5 Gbps (SStatus 113 SControl F310)
Sep 18 02:04:44 NetworkSpace2 kernel: [  181.390000] ata1.00: configured for UDMA/33
Sep 18 02:04:44 NetworkSpace2 kernel: [  181.390000] ata1: EH complete
Sep 18 02:04:44 NetworkSpace2 kernel: [  181.410000] ata1: exception Emask 0x10 SAct 0x0 SErr 0x180000 action 0x6 frozen
Sep 18 02:04:44 NetworkSpace2 kernel: [  181.410000] ata1: edma_err_cause=00000020 pp_flags=00000001, SError=00180000
Sep 18 02:04:44 NetworkSpace2 kernel: [  181.410000] ata1: SError: { 10B8B Dispar }
Sep 18 02:04:44 NetworkSpace2 kernel: [  181.410000] ata1: hard resetting link
Sep 18 02:04:45 NetworkSpace2 kernel: [  181.920000] ata1: SATA link up 1.5 Gbps (SStatus 113 SControl F310)
Sep 18 02:04:45 NetworkSpace2 kernel: [  181.980000] ata1.00: configured for UDMA/33
Sep 18 02:04:45 NetworkSpace2 kernel: [  181.980000] ata1: EH complete
Sep 18 02:04:45 NetworkSpace2 kernel: [  181.990000] ata1.00: exception Emask 0x0 SAct 0x0 SErr 0x180000 action 0x6 frozen
Sep 18 02:04:45 NetworkSpace2 kernel: [  181.990000] ata1.00: edma_err_cause=00000020 pp_flags=00000001, SError=00180000
Sep 18 02:04:45 NetworkSpace2 kernel: [  181.990000] ata1: SError: { 10B8B Dispar }
Sep 18 02:04:45 NetworkSpace2 kernel: [  181.990000] ata1.00: cmd c8/00:20:e0:f2:38/00:00:00:00:00/e0 tag 0 dma 16384 in
Sep 18 02:04:45 NetworkSpace2 kernel: [  181.990000]          res d0/00:20:e0:f2:38/00:03:00:00:00/e0 Emask 0x12 (ATA bus error)
Sep 18 02:04:45 NetworkSpace2 kernel: [  181.990000] ata1.00: status: { Busy }
Sep 18 02:04:45 NetworkSpace2 kernel: [  181.990000] ata1: hard resetting link
Sep 18 02:04:45 NetworkSpace2 kernel: [  182.500000] ata1: SATA link up 1.5 Gbps (SStatus 113 SControl F310)
Sep 18 02:04:45 NetworkSpace2 kernel: [  182.560000] ata1.00: configured for UDMA/33
Sep 18 02:04:45 NetworkSpace2 kernel: [  182.560000] ata1: EH complete
Sep 18 02:e.vendor

After the e.vendor in that above logfile, which really shouldn’t be there, is a load of corrupt looking garbage, and I’m sure those “ATA bus error”, means that there’s something wrong with the drive, or the system can’t read from it. I remember those before the HDD died in my old firewall / server machine many years ago.

I’m not sure if that info above will help anyone else out, but drop me an email if it doesn’t, I’ll see what I can do.

UPDATE 4TH NOVEMBER 2012

In what is honestly going to be my final word on the subject, I thought I’d have one last little play with the dreaded Lacie Network Space 2, and my own personal findings. I powered it on again today, for one last “hurrah”. It, once again did either of the slow flashing, or rhythmic red/blue flashing. For funsies, I threw in a generic 500Gb drive, which it won’t have been expecting. The method behind my madness was that it may have had a failsafe copy of its operating system in ROM, and if it detects the “new” HDD, it might kick into some factory restore mode and initialize the drive. This wouldn’t appear to be the case, as I instantly got the flashing red/blue light, as soon as the drive began to boot. A factory reset didn’t help either.
Therefore, I consider the drive now to be scrapped.

I’ll keep the drive out of it, naturally. 2Tb could certainly come in useful (On Dec 8th 2012, I did indeed do this, via a cheap SATA caddy from C World). I don’t believe there’s a physical fault with the drive, but I do think there was some sort of root file system corruption. A decent NAS drive would be able to at least do something failsafe-y, perhaps a backup / disagnostic copy of the OS kept in flash ROM to allow some type of automatic restore / file system rebuild… the cost of flash memory these days is ridiculously low. It can’t be too difficult / much more expensive to do?

So, it’s all over. It was a short, bittersweet relationship. It had its uses. It turned out to be very limited, slow, and ultimately risked 2 terabytes of my precious porn torrentz photos of fluffy kittens and whalesong. As a plus-side (I can think of two), the drive was easy to open, and the OS was Linux based, so the data was easily rescued.

It’s not the end of my NAS drive experience though. I enjoyed it while it lasted, and I’m feeling the need to spend some money on something bigger and better…

UPDATE 4/2/17 It took me a good few years before I relied on NAS storage again, but these days I’m running a Synology DS216j. I never went back to this Lacie heap of shit. The drive itself still survives.

UPDATE THE 3rd 28/3/21 I still swear by the Synology NAS enclosures. Really happy with them. I’m guessing that all of the LaCie drives of this type have either failed, or have been superceded by other drives by this point, so I won’t be keeping this series of posts around for much longer, but I hope it proved useful for someone. The loose 2Tb drive STILL surprives. I think. No idea where it is now.

Hard drive woes 2012, part 1…

Good lord, I bet you thought I’d fallen off the face of the earth. 2 months without an update. I’m afraid I’ve had another one of those “writers block” periods, where anything I write down blog-wise is just got enough to meet with my high standards of complete and utter tripe. Today, I shall strive to meet, nay even exceed my own lofty demands, as I begin to tell you, and explain in minute detail the problems I’ve currently been having when it comes to hard drives, or more exacter, my 2Tb LaCie Network Space 2 NAS drive.

To put it simply, a NAS drive is a network drive. A little box, whose sole purpose is to sit at one end of an ethernet connection, and serve me data.

“It’s easier than adding an internal drive to my computer”, I thought.

“It’ll be more convenient than leaving my computer on all the time”, I thought.

“It’ll be fun”, I thought.

To be fair, it was all of those three things, until Tuesday night. I’d been out to the Steak club. It’s not a club, but you can buy steaks for cheap. It was delicious. I returned home, and tried to access the drive through the network. Nothing. Not even the smallest hint of a sausage. Well, there was, because I could “ping” the drive on the network, but couldn’t access anything else. Not even the power button was responsive

“Joy”, I thought, as I ripped the power cable out of the back. It was then, when my nice little network drive, became nothing more than a solid, black brick. It would do one of two things, either start flashing red/blue after a few seconds, or slowly flash blue. I’ve left the drive in both of these modes for 24 hours, but still, nothing to report. Of course, just like any tech savvy idiot, I whinged on Twitter…

Bah. Looks like the NAS has given up the ghost. flashing red/blue light on Network Space 2 2Tb? Terminal?

Their reply was a little optimistic…

@mercuryvapour Hi, if its rhythmical red/blue/red/blue that means the automatic backup is in progress.

Yup, I checked the manual, and there it was, the flashing blue/red. I was almost excited, until I realised I’d left the drive in this state for 24 hours. I got back to them…

It is blue/red. Starts about 10 seconds after switch-on, been flashing like this for 24 hours, no other response from drive

I sat, and waited for what would hopefully be a nice, long list of steps I could get around this…

If the drive doesn’t work, you should get in contact with our support guys to investigate whats going on with it.

YE…. oh. You could almost hear my heart deflate, as I stared at the flashing box. It’s crypt of data, cuttently sealed, in a plastic shell, designed by Neil Poulton. the whole purpose of this blog entry is to see if anyone else has had the same problem, if they got around it, and if they avoided having to contact technical support…

THINGS I KNOW:-

If I need to crack it open, There’s just one drive in the box, so that should mean there’s no RAID shit to worry about. It’s either in ext3 or ext4 in XFS format (EDIT: SEE note below), which all versions of Linux should support. there are 10 partitions…

A couple of days before its death, I pulled the logfiles off it, though I doubt they’d give me any insight as to what’s wrong with it, they’ll at least give me some information on how the drive lived before it dies.

Line 57: May 26 23:24:29 NetworkSpace2 [DEBUG resource.handle_event@262] Updating [Disk 4 - /dev/sda - enabled]
	Line 60: May 26 23:24:29 NetworkSpace2 [DEBUG resource.set@460] Setting config value unicorn.storage.volume.root_device to [/dev/sda2]
	Line 65: May 26 23:24:30 NetworkSpace2 [DEBUG resource.handle_event@262] Updating [Volume 1 - /dev/sda9 - enabled]
	Line 66: May 26 23:24:30 NetworkSpace2 [DEBUG resource.handle_event@262] Updating [Volume 2 - /dev/sda8 - enabled]
	Line 67: May 26 23:24:30 NetworkSpace2 [DEBUG resource.handle_event@262] Updating [Volume 3 - /dev/sda7 - enabled]
	Line 68: May 26 23:24:31 NetworkSpace2 [DEBUG resource.handle_event@262] Updating [Volume 4 - /dev/sda6 - enabled]
	Line 69: May 26 23:24:31 NetworkSpace2 [DEBUG resource.handle_event@262] Updating [Volume 5 - /dev/sda5 - enabled]
	Line 70: May 26 23:24:31 NetworkSpace2 [DEBUG resource.handle_event@262] Updating [Volume 6 - /dev/sda4 - enabled]
	Line 71: May 26 23:24:31 NetworkSpace2 [DEBUG resource.handle_event@262] Updating [Volume 7 - /dev/sda3 - enabled]
	Line 72: May 26 23:24:32 NetworkSpace2 [DEBUG resource.handle_event@262] Updating [Volume 8 - /dev/sda2 - enabled]
	Line 74: May 26 23:24:32 NetworkSpace2 [DEBUG resource.handle_event@262] Updating [Volume 9 - /dev/sda10 - enabled]
	Line 75: May 26 23:24:33 NetworkSpace2 [DEBUG resource.handle_event@262] Updating [Volume 10 - /dev/sda1 - enabled]

I feel I’m going to have fun and games with this…

EDIT: The fun and games, of which there were none of, are described in the post following this one. I’m not up on my Linux filesystems, so I’m not sure if there’s a big difference between what I originally said (ext2/3) or XFS. It may be possible to read XFS partitions in Windows, but it’s probably easier, quicker and less time consuming to download a live Linux CD and go nuts with it from there.